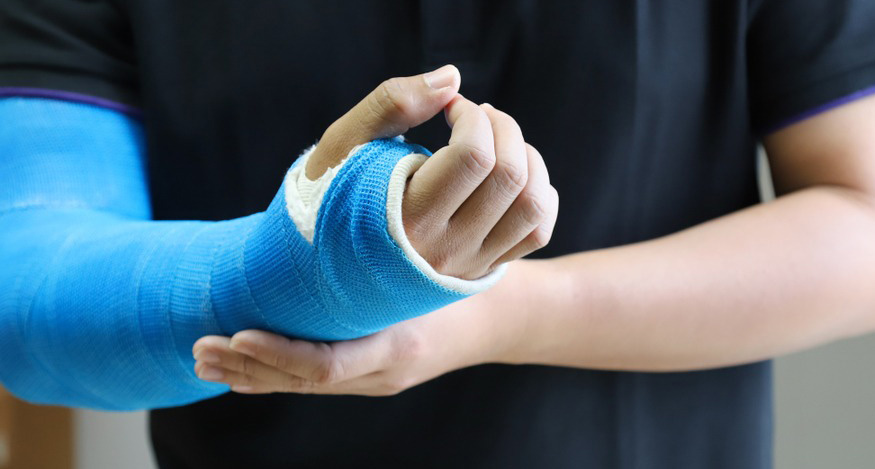
Rebuilding upper body strength after injury requires a safe and progressive approach. This guide on how to use a dip station for arm recovery training details effective exercises that target the triceps and chest muscles. We’ll explore modifications to the standard dip to accommodate various injury levels, ensuring a safe and controlled return to strength. This will help you understand how dip stations, when used correctly, can be a valuable tool in your recovery journey.
You may also refer to Are Weighted Balls Effective for Post-Injury Workouts? Efficient Rehab Tips
- Dip Station Recovery Training
- Mastering Dip Station Recovery
- Safe Dip Station Arm Recovery
- Dip Station Arm Recovery Training: Progressive Overload
- How to Use a Dip Station for Arm Recovery Training Conclusion
- How to Use a Dip Station for Arm Recovery Training Quick FAQ
Dip Station Recovery Training
Effective Dip Station Recovery Training requires a carefully planned and progressive approach. As a certified physical therapist specializing in orthopedic rehabilitation, I emphasize the importance of safe and effective exercises for individuals recovering from upper body injuries. The dip station, with appropriate modifications, provides a versatile tool for rebuilding strength in the triceps and chest muscles, crucial for arm recovery. Your recovery journey will be personalized to your specific needs and injury, ensuring a safe and gradual increase in intensity.
Consider these key aspects of your Dip Station Recovery Training program:
- Gradual Progression: Start with assisted dips using resistance bands or a spotter. Gradually decrease assistance as strength improves. Never push yourself beyond your comfortable range of motion or pain tolerance.
- Proper Form: Maintaining correct posture and technique is paramount to prevent re-injury. Focus on controlled movements, avoiding jerky or rushed actions. A therapist can guide you on proper form and technique during your Dip Station Recovery Training.
- Listen to Your Body: Pain is a significant indicator that you are overexerting yourself. Stop the exercise immediately if you feel any sharp or persistent pain and consult your physical therapist. Rest and recovery are integral parts of the Dip Station Recovery Training process.
- Varied Exercises: Don’t limit yourself to just standard dips. Explore variations like incline dips (easier) or decline dips (harder) to target different muscle groups and challenge yourself progressively. Your Dip Station Recovery Training should be diversified to maximize results.
- Regularity and Consistency: Consistent training is key to achieving optimal recovery. Aim for regular sessions, following your therapist’s recommendations, to steadily improve strength and range of motion. Consistency is vital for effective Dip Station Recovery Training.
Remember, your personalized Dip Station Recovery Training plan should always prioritize safety and gradual progression. The goal is to rebuild strength and function safely, minimizing the risk of setbacks. Regular check-ins with your physical therapist are recommended throughout your recovery to ensure you are progressing effectively and safely.
Mastering Dip Station Recovery
Mastering dip station recovery involves a gradual and progressive approach, carefully tailored to your individual needs and recovery stage. As a certified physical therapist specializing in orthopedic rehabilitation, I emphasize the importance of safe and effective exercises. Remember, proper form is crucial to prevent re-injury and maximize the benefits of dip station training.
To achieve optimal results during your arm recovery journey, consider these key points:
- Start Slowly: Begin with assisted dips, using a resistance band or a spotter to reduce the load on your arms. Gradually decrease assistance as your strength improves.
- Focus on Control: Avoid bouncing or jerking movements. Perform each repetition with deliberate control, focusing on the contraction and extension of your triceps and chest muscles. This controlled movement is critical for safe and effective recovery.
- Listen to Your Body: Pay attention to any pain or discomfort. Stop the exercise immediately if you experience any sharp or persistent pain. Never push yourself beyond your limits during recovery.
- Vary Your Grip: Experiment with different hand positions (close-grip, wide-grip) to target various muscle groups within your arms and chest. This variation ensures a comprehensive approach to strengthening.
- Incorporate Other Exercises: Dip station exercises are highly effective, but a well-rounded recovery program should include other exercises to further strengthen supporting muscles. These exercises might include light weight training or resistance band work. This holistic approach helps to rebuild overall strength and improve functionality.
By following these guidelines and working closely with your physical therapist, you can safely and effectively use a dip station to achieve successful arm recovery and rebuild strength.
Safe Dip Station Arm Recovery
As a certified physical therapist, I emphasize the importance of safe and gradual progression in any rehabilitation program. This is especially crucial when using a dip station for arm recovery. The dip station, while incredibly effective for building triceps and chest strength, can also pose risks if not approached correctly, particularly for individuals recovering from injuries. Therefore, modifying the exercises to accommodate individual limitations is paramount.
To ensure safe dip station arm recovery, consider these essential modifications:
- Assisted Dips: Begin with assisted dips using resistance bands or a spotter to reduce the load on your injured arm. This allows you to focus on proper form and gradually build strength without overexertion.
- Partial Range of Motion: Start with only a partial range of motion, performing dips only halfway down. As strength improves, gradually increase the range of motion. This reduces stress on the injured area during the initial stages of recovery.
- Incline Dips: Using an incline dip station (or placing your feet on a raised surface) lessens the load on your shoulders and triceps, making it a safer starting point for those with significant weakness or pain.
- Frequency and Duration: Listen to your body. Begin with fewer repetitions and sets, focusing on quality over quantity. Gradually increase the frequency and duration of your workouts as tolerated, avoiding pain or discomfort.
- Proper Form: Maintaining correct posture and form is critical to prevent further injury. A physiotherapist can provide guidance on proper technique and modifications tailored to your specific needs.
Remember, safe dip station arm recovery is a journey, not a race. Patience, consistency, and a focus on proper technique are key to achieving your rehabilitation goals and regaining full function of your arm.
“`html
| Modification | Description |
|---|---|
| Assisted Dips | Begin with resistance bands or a spotter to reduce load and focus on proper form. |
| Partial Range of Motion | Start with dips only halfway down, gradually increasing range as strength improves. |
| Incline Dips | Use an incline station or raised feet to lessen load on shoulders and triceps. |
| Frequency and Duration | Start with fewer reps and sets, increasing gradually as tolerated; prioritize quality over quantity. Avoid pain. |
| Proper Form | Maintain correct posture; seek guidance from a physiotherapist for personalized technique. |
“`
Dip Station Arm Recovery Training: Progressive Overload
Progressive overload is a cornerstone of effective Dip Station Arm Recovery Training. This means gradually increasing the challenge of your exercises over time. This doesn’t necessarily mean adding weight immediately after an injury; instead, it focuses on building strength and endurance safely and effectively. For individuals recovering from upper body injuries, this approach is crucial for preventing re-injury and maximizing recovery.
Consider these key aspects of progressive overload within your Dip Station Arm Recovery Training:
- Start with assisted dips: Begin with assisted dips using resistance bands to reduce the load on your arms. This allows you to focus on proper form and gradually build strength.
- Increase repetitions: Once comfortable with assisted dips, focus on increasing the number of repetitions you can perform with good form before progressing to the next stage.
- Increase sets: After mastering repetitions, add more sets to your workout. This increases the overall volume of your training, further stimulating muscle growth and strength.
- Reduce assistance: Gradually decrease the assistance from the resistance band as you get stronger, eventually progressing to unassisted dips.
- Add weight: Once you can perform several sets of unassisted dips, consider adding weight using a weighted vest or dip belt to continue challenging your muscles and promoting further strength gains. Always prioritize proper form over the amount of weight lifted.
- Vary exercises: Incorporate other upper body exercises into your routine, such as incline push-ups or chest presses, to promote balanced strength and prevent overtraining of specific muscles. These exercises, used alongside dip station workouts, offer comprehensive rehabilitation.
Remember, listening to your body is crucial. If you experience pain, stop the exercise and consult with your physical therapist or doctor. The goal of Dip Station Arm Recovery Training is safe and effective rehabilitation, not pushing through pain.
How to Use a Dip Station for Arm Recovery Training Conclusion
Successfully navigating How to Use a Dip Station for Arm Recovery Training requires a commitment to a safe, progressive, and individualized approach. We’ve explored various modifications and progressions to suit different injury levels and recovery stages, emphasizing the importance of proper form, controlled movements, and listening to your body’s signals. Remember, the goal isn’t to rush the process but to rebuild strength and functionality steadily and safely.
Throughout this guide on How to Use a Dip Station for Arm Recovery Training, we’ve highlighted the versatility of the dip station as a tool for rehabilitation. From assisted dips with resistance bands to incline variations and the eventual progression to weighted dips, the possibilities for tailored recovery are vast. This adaptable nature allows for a personalized program that caters to individual needs and limitations.
The key takeaways from this exploration of How to Use a Dip Station for Arm Recovery Training are:
- Prioritize safety: Always start slowly, use assistance when needed, and pay close attention to your body’s feedback. Pain is a warning sign – never ignore it.
- Embrace progression: Gradually increase the intensity and challenge of your workouts as your strength and endurance improve. This gradual progression is key to sustainable recovery.
- Maintain proper form: Correct technique is crucial to maximize the benefits of dip station training and minimize the risk of re-injury. If unsure, seek guidance from a qualified professional.
- Consistency is key: Regular, consistent workouts are essential for effective arm recovery. Consistency, alongside proper technique and gradual progression, optimizes results.
- Seek professional guidance: Working with a physical therapist or other healthcare professional can provide personalized guidance, ensuring your recovery plan is safe and effective. A professional can fine-tune your plan based on your individual needs.
By carefully following the principles outlined in this guide on How to Use a Dip Station for Arm Recovery Training, you can effectively utilize the dip station to regain strength, improve function, and confidently return to your desired activities. Remember that patience and persistence are your allies in this journey. Your commitment to a safe and structured recovery will yield positive and lasting results.
How to Use a Dip Station for Arm Recovery Training Quick FAQ
What are the benefits of using a dip station for arm recovery?
Dip stations offer a versatile way to rebuild strength in the triceps and chest muscles, crucial for arm recovery after injury. They allow for progressive overload, enabling a safe and gradual increase in intensity. The various modifications available (assisted dips, incline dips, partial range of motion) cater to different injury levels and recovery stages, ensuring a safe and effective rehabilitation process.
How do I safely progress with dip station exercises during recovery?
Safe progression involves a gradual increase in challenge. Start with assisted dips using resistance bands or a spotter, focusing on perfect form. Gradually decrease assistance, increase repetitions and sets, and eventually progress to unassisted dips. Only then should you consider adding weight. Always listen to your body and stop if you feel pain. Remember, consistency and proper form are more important than speed.
What modifications can I make to dip station exercises to accommodate my injury?
Several modifications exist to accommodate various injury levels. Assisted dips reduce the load on your arms. Partial range of motion exercises decrease stress on the injured area. Incline dips lessen the strain on your shoulders and triceps. Your physical therapist can guide you on the best modifications for your specific injury and recovery stage. Remember, safety and gradual progression are paramount.